


















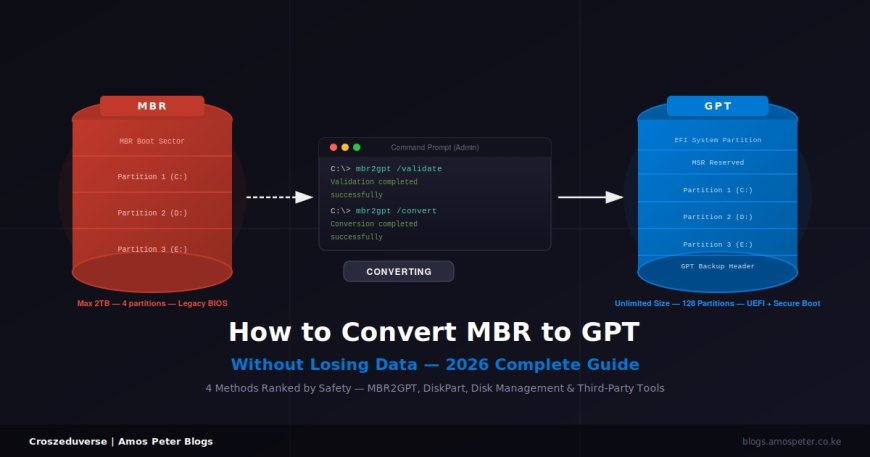
How to Convert MBR to GPT Without Losing Data (2026 Complete Guide - 4 Methods)
Learn how to convert MBR to GPT without losing data in 2026. This guide covers 4 methods - MBR2GPT, DiskPart, Disk Management, and free third-party tools ranked by safety, with exact commands, screenshots, and fixes for every common error including MBR2GPT validation failed.

f Windows 11 is blocking your upgrade with "This PC doesn't meet the minimum system requirements" or if you simply have a drive larger than 2TB that is not being fully used the fix is converting your disk from MBR to GPT. This guide shows you exactly how to do it, ranked from safest to most destructive.
Before you read anything else: Regardless of which method you use, back up your data first. Copy important files to an external drive or cloud storage. Even the safest method can go wrong if the disk has errors, and no guide can protect data on a failing drive.
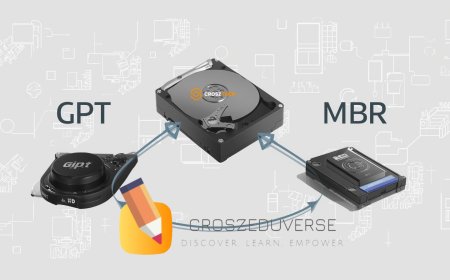
MBR vs GPT: What Is the Difference and Why Does It Matter?
| Feature | MBR (Master Boot Record) | GPT (GUID Partition Table) |
|---|---|---|
| Maximum disk size | 2TB | 9.4 ZB (virtually unlimited) |
| Maximum primary partitions | 4 | 128 |
| Boot mode supported | Legacy BIOS | UEFI (required for Windows 11) |
| Backup partition table | No | Yes (stored at both ends of disk) |
| Secure Boot support | No | Yes |
| Recovery features | Limited | Built-in redundancy |
| Supported by Windows 11 | Partially (no UEFI features) | Fully supported and required |
Why convert now? Windows 10 reached end of support in October 2025. Windows 11 requires GPT and UEFI. If your system disk is still MBR, you cannot upgrade to Windows 11 or enable Secure Boot even if your hardware supports both. Converting your disk is the correct fix.
Before You Start: Check Your Current Partition Style
Do not assume your disk is MBR. Confirm it first:
- Press Windows + X and click Disk Management
- Right-click your main disk (Disk 0) in the bottom panel
- Click Properties > Volumes tab
- Look at the Partition style field it will say either Master Boot Record (MBR) or GUID Partition Table (GPT)
If it already says GPT, you do not need to convert. If it says MBR, continue below.
Also check your firmware type:
- Press Windows + R, type
msinfo32, press Enter - Look for BIOS Mode - it will say either Legacy or UEFI
If you are already in UEFI mode with an MBR disk, conversion is straightforward. If you are in Legacy mode, you will need to switch your firmware to UEFI after conversion (covered at the end of this guide).
Method 1: MBR2GPT - Built-in Windows Tool (Safest, No Data Loss)
Best for: System disk (your C: drive), Windows 10/11, no data loss required Requires: Windows 10 version 1703 or later, or Windows 11
MBR2GPT.exe is a Microsoft-built tool that lives in C:\Windows\System32. It converts your disk without deleting any partitions or data. It is the only method officially supported by Microsoft for converting your system disk.
Limitation: MBR2GPT only works on your system disk (the disk Windows is installed on). It also requires that the disk has no more than 3 primary partitions and no extended/logical partitions.
Step 1 - Open an Elevated Command Prompt
Press Windows + S, type cmd, right-click Command Prompt, and click Run as administrator. Click Yes on the UAC prompt.
Step 2 - Find Your Disk Number
diskpart
list disk
exit
Note the number next to your system disk. It is usually Disk 0.
Step 3 - Validate the Disk
Run the validation check first. This tells you if your disk can be converted without making any changes:
mbr2gpt /validate /disk:0Replace 0 with your disk number if different.
A successful output looks like this:
MBR2GPT: Attempting to validate disk 0
MBR2GPT: Retrieving layout of disk
MBR2GPT: Validating layout, disk sector size is: 512
MBR2GPT: Validation completed successfully
If you get a Validation failed error, see the troubleshooting section below.
Step 4 - Convert the Disk
Once validation passes, run the conversion:
mbr2gpt /convert /disk:0A successful output ends with:
MBR2GPT: Conversion completed successfully
MBR2GPT: Before reboot, update the firmware to boot to UEFI
Do not restart yet read Step 5 first.
Step 5 - Switch Your Firmware from BIOS to UEFI
This is the step most guides forget to mention. Converting the disk is only half the job. If your PC is still configured to boot in Legacy BIOS mode, it will not boot after conversion.
- Restart your PC and enter BIOS/UEFI settings. The key varies by manufacturer — usually Del, F2, F10, or Esc during startup. Your screen will briefly show the key when the PC first powers on.
- Look for a setting called Boot Mode, Boot Type, or Legacy/UEFI. It may be under Boot, Advanced, or Security tabs.
- Change it from Legacy (or CSM) to UEFI.
- While in UEFI settings, also enable Secure Boot if you see it.
- Save and exit (usually F10).
Your PC will now boot Windows normally using UEFI from the converted GPT disk.
Using MBR2GPT from Command Prompt (Without Advanced Startup)
If you want to run MBR2GPT from your live Windows desktop without booting into recovery, add the /allowFullOS flag:
mbr2gpt /validate /disk:0 /allowFullOS
mbr2gpt /convert /disk:0 /allowFullOS
This works in Windows 10 version 1703 and later.
Method 2: DiskPart Command (Data Loss - Wipes the Disk)
Best for: Non-system data disks (not your C: drive), or a fresh install where you are about to reinstall Windows Warning: This method DELETES ALL DATA on the disk. Do not use it on your system disk or any disk with files you need.
- Press Windows + X > Windows PowerShell (Admin) or Command Prompt (Admin)
- Type
diskpartand press Enter - Type
list diskand press Enter - identify your target disk number carefully - Type
select disk X(replace X with your disk number) - Type
clean- this erases everything on the selected disk - Type
convert gpt - Type
exit
The disk is now GPT. You can create new partitions in Disk Management or during a Windows reinstall.
Method 3: Disk Management (Data Loss - Wipes Partitions)
Best for: Non-system data disks only Warning: Same as DiskPart all partitions are deleted first.
- Press Windows + X > Disk Management
- Right-click each partition/volume on the target disk and click Delete Volume until the entire disk shows as Unallocated
- Right-click the disk label on the left (e.g., Disk 1) not a partition, but the disk itself
- Click Convert to GPT Disk
- Done the disk is now GPT. Create new partitions as needed.
Note: If the Convert to GPT Disk option is greyed out, the disk still has existing partitions. Delete all remaining partitions first.
Method 4: Free Third-Party Tool - GUI Method (No Data Loss, Any Disk)
Best for: Users who want a visual interface, or need to convert a non-system data disk without data loss
MBR2GPT only works on system disks. If you have a secondary data disk (not the C: drive) full of files and want to convert it to GPT without losing anything, MBR2GPT cannot help you. A free third-party tool can.
Recommended free tool: IM-Magic Partition Resizer Free (free for home users)
Steps:
- Download and install IM-Magic Partition Resizer Free from its official site
- Launch the application
- Right-click the disk (not a partition) that you want to convert
- Click Convert to GPT Disk
- Click Apply in the toolbar to commit the change
- Restart when prompted
The conversion runs without deleting your files.
Other free tools that do the same: MiniTool Partition Wizard Free, GParted (Linux-based, bootable USB).
Which Method Should You Use?
| Your Situation | Use This Method |
|---|---|
| Converting your C: drive (system disk) | Method 1 — MBR2GPT |
| Secondary data disk, want to keep files | Method 4 — Free third-party tool |
| Secondary data disk, fine to wipe it | Method 2 or 3 — DiskPart or Disk Management |
| Installing Windows fresh on a blank disk | Method 2 — DiskPart during setup |
| Upgrading to Windows 11 | Method 1 — MBR2GPT, then enable UEFI |
After Conversion: Verify It Worked
After restarting and booting into Windows:
- Press Windows + X > Disk Management
- Right-click the disk you converted
- Click Properties > Volumes tab
- Partition style should now say GUID Partition Table (GPT)
Also verify UEFI mode:
- Press Windows + R, type
msinfo32, press Enter - BIOS Mode should now say UEFI
If both confirm GPT and UEFI, the conversion is complete and your system is fully ready for Windows 11.
Troubleshooting MBR2GPT Errors
"MBR2GPT: Disk layout validation failed for disk 0"
This is the most common MBR2GPT error. It usually means one of these:
- You have 4 or more primary partitions. MBR2GPT requires 3 or fewer. Open Disk Management and check. If you have a recovery partition plus C:, System Reserved, and another partition — that is already 4. You may need to delete a non-essential partition first.
- You have extended or logical partitions. MBR2GPT cannot handle these. Convert them to primary partitions first using a third-party tool, or use Method 4 instead.
- The disk has errors. Run
chkdsk C: /fin an elevated Command Prompt, restart when prompted, then try MBR2GPT again.
"MBR2GPT: Cannot find OS partition"
MBR2GPT cannot identify which partition Windows is on. This often happens if your BCD (Boot Configuration Data) is corrupted. Fix:
bootrec /rebuildbcd
bootrec /fixmbr
bootrec /fixboot
Run these from an elevated Command Prompt or from Windows Recovery Environment, then retry MBR2GPT.
"MBR2GPT: Failed to update ReAgent.xml, please try again"
This is a non-fatal warning about Windows Recovery Environment. It does not mean the conversion failed. If the output also says "Conversion completed successfully," your disk has been converted correctly. The ReAgent.xml issue can be fixed afterward by running:
reagentc /enablein an elevated Command Prompt.
"Windows failed to start" after conversion
You likely forgot to switch firmware from Legacy BIOS to UEFI. Restart your PC, enter BIOS setup, and change the boot mode to UEFI. Save and exit. Windows should boot normally.
MBR2GPT runs from WinPE (Advanced Startup) but not from desktop
If the desktop version does not work, use the Advanced Startup approach:
- Go to Settings > System > Recovery > Advanced startup > Restart now
- Choose Troubleshoot > Advanced options > Command Prompt
- Run
mbr2gpt /validate /disk:0thenmbr2gpt /convert /disk:0
In WinPE, you do not need the /allowFullOS flag.
Frequently Asked Questions
- Will converting MBR to GPT delete my files? Only with DiskPart and Disk Management both require wiping the disk first. MBR2GPT and third-party tools like IM-Magic Partition Resizer are designed to keep your data intact. Always back up before starting regardless of which method you use.
- Can I convert GPT back to MBR? Yes. DiskPart's
convert mbrcommand does this, but it also wipes all data. You can also use third-party tools for a non-destructive GPT-to-MBR conversion if needed. - Does converting MBR to GPT speed up my PC? Not directly. The partition style does not affect performance. However, enabling UEFI and Secure Boot after the conversion can improve startup speed and security.
- My PC says "Disk 0 is already GPT" when I run the MBR2GPT command. Your system disk is already GPT — you do not need to convert it. Check whether you need to enable UEFI in your firmware settings instead.
- Can I convert MBR to GPT on Windows 7 or 8? MBR2GPT requires Windows 10 version 1703 or later. For Windows 7/8, you would need to use a third-party tool or do a clean reinstall with a GPT disk.
- Is GPT compatible with all operating systems? Yes. All modern versions of Windows (8.1+), macOS, and major Linux distributions support GPT. Older operating systems (Windows XP, Vista 32-bit) do not support booting from GPT, but can read GPT data disks.
Final Thoughts
Converting from MBR to GPT is one of the most important maintenance tasks for any Windows user in 2026. With Windows 10 end of life and Windows 11 requiring both GPT and UEFI, the conversion is no longer optional for users who want to stay up to date with security patches and new features.
For system disks: use MBR2GPT it is built-in, free, and non-destructive. For data disks you want to keep: use a free third-party tool like IM-Magic Partition Resizer. For blank disks or fresh installs: use DiskPart and convert before installing Windows.
Always validate first, always back up, and never skip the UEFI firmware step after converting your system disk.
What's Your Reaction?