


Java HOME – How to Set Up Java and Run Your First Program (2025) | CroszEduverse
Learn how to set up Java on Windows, macOS, or Linux. This CroszEduverse tutorial explains how to install the JDK, configure your IDE, and run your first Java program step-by-step.
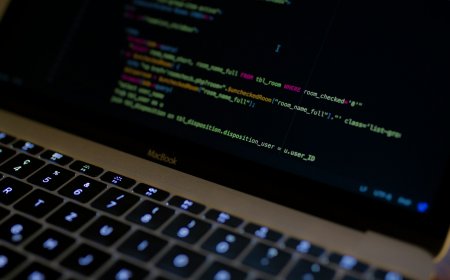
Before you start writing code in Java, you need to set up your development environment properly. This means installing the Java Development Kit (JDK), choosing an editor or IDE, and running your first program to confirm everything is working.
In this CroszEduverse lesson, we’ll go step-by-step through the setup process for beginners whether you’re on Windows, macOS, or Linux.
1. What You Need to Install
a) Java Development Kit (JDK)
The JDK is a software package that includes everything you need to write, compile, and run Java programs.
You can download it from:
???? Oracle Java Downloads
or
???? OpenJDK (open-source version).
When installing, follow the instructions for your operating system.
After installation:
-
On Windows, check that Java is installed by opening Command Prompt and typing:
You should see something like:
-
On macOS or Linux, open your terminal and type the same command.
If you see the version number — congratulations, Java is installed correctly!
2. Setting Up Your Development Environment
You can write Java code in any text editor, but using an IDE (Integrated Development Environment) makes coding faster and easier.
Popular IDEs for Java:
-
IntelliJ IDEA (recommended for beginners)
-
Eclipse IDE
-
Visual Studio Code (with Java extensions)
-
NetBeans
Each IDE gives you:
✅ Syntax highlighting
✅ Auto-completion
✅ Easy debugging
✅ Built-in terminal and compiler
Once your IDE is installed, create a new Java project. It will automatically create a folder structure similar to this:
3. Writing Your First Java Program
Now that you’re ready, let’s write a simple program.
Example:
Save this file as Main.java inside your src folder.
To run it:
-
In your IDE, click “Run”.
-
If you’re using Command Prompt or Terminal, navigate to your file location and type:
Output:
4. How It Works
Let’s break down the code:
-
public class Main→ defines a class named “Main”. Every Java program must have at least one class. -
public static void main(String[] args)→ the entry point of your program (Java looks for this method when running your code). -
System.out.println()→ prints text or data to the screen.
You just ran your first Java program! ????
5. Folder Structure Overview
Here’s what happens behind the scenes:
-
You save your source file as
Main.java. -
The compiler (
javac) converts it into bytecode:Main.class. -
The JVM (Java Virtual Machine) executes the bytecode line by line.
This process — compile → run — makes Java fast and portable across platforms.
6. Common Setup Errors
| Problem | Cause | Fix |
|---|---|---|
'java' is not recognized |
PATH variable not set | Add JDK path to your system environment variables |
| Compilation error | File name doesn’t match class name | Make sure file is named Main.java |
| No output shown | Missing System.out.println() |
Add print statement to display text |
7. Quick Recap
✅ You installed the JDK
✅ Set up an IDE or text editor
✅ Wrote your first Java program
✅ Compiled and ran it successfully
You’re now officially ready to dive deeper into the Java language!
Next Up → Java Introduction
In the next lesson, we’ll look at what makes Java special, its main features, and why it’s such a reliable and flexible programming language.
What's Your Reaction?